
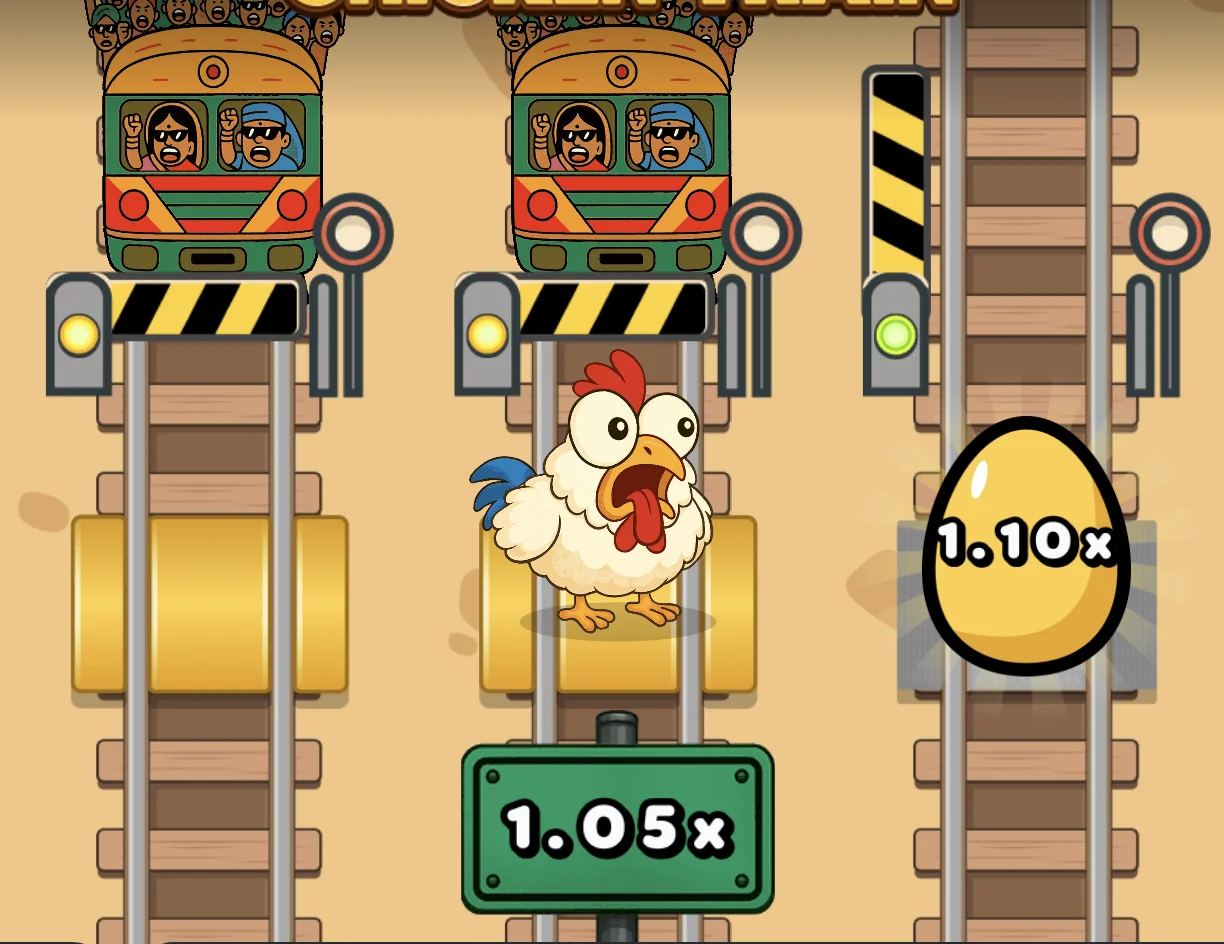
To play Chicken Train, first identify the risk selector, stake field, start control, multiplier display and any cashout control shown by the current operator. The screenshots below explain where those elements appear in the captured interface without claiming that every operator build behaves identically.
If a Chicken Train demo is available, use it to compare the live help panel with this guide. Check the selected risk label, displayed limits, Bonus Run explanation and settlement rules one item at a time. A short practice session can teach the controls, but it cannot establish win frequency or predict the next result.
Before paid play, set a fixed entertainment budget and read the operator's current rules. Stop if the interface, cashout behavior or loss conditions remain unclear.
Interface Breakdown
Chicken Train's captured interface has 4 main areas: the railway game board (center), risk level selector (top), bet panel with Play button (bottom), and multiplier egg (on the tracks). Check control size and reach in demo mode on your own mobile screen.
The captured interface uses a retro pixel-art train-station design. The main game board, risk selector, bet controls and multiplier display are visible together in the screenshots below.
The Game Board
The repository screenshots show vertical railway tracks, the chicken between the rails, train graphics, striped barriers and green/red lights. Use those landmarks to orient yourself, then confirm what each light and barrier state means in the active help panel.

The saved image assets include the chicken at the station and a separate dollar-eyes result pose. They document the visual design; animation timing and the conditions for each pose should be checked in the current build.
The Bet Panel
Located at the bottom of the screen. From left to right:
- Bet amount field — shows current bet in USD (e.g., "0.2$"). Tap to enter custom amount.
- Minus/Plus buttons — adjust bet by fixed increments
- /2 and x2 buttons — halve or double your current bet quickly
- Play button — the captures show a green start control; check its live label and state changes
- Withdraw panel — the captures identify the potential-cashout area; confirm how it executes in the operator rules
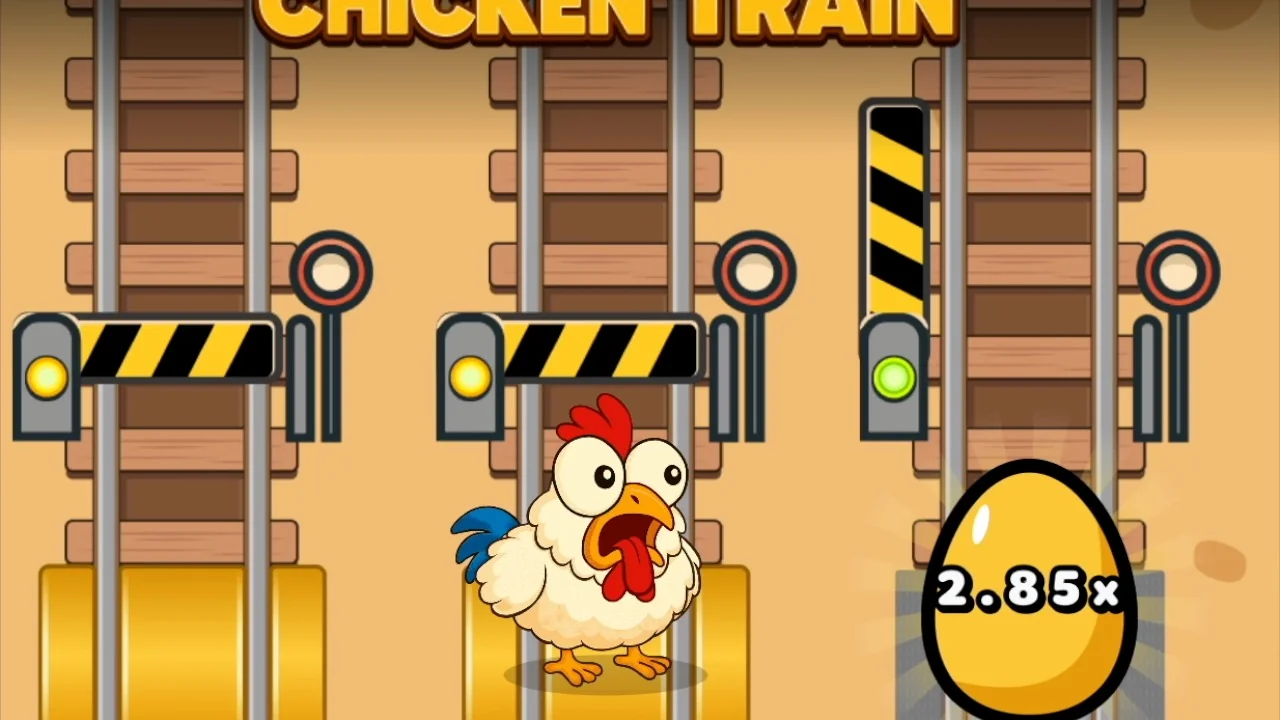
The Golden Egg Multiplier
This is Chicken Train's signature visual element. The repository capture below shows a golden egg displaying 1.01x. Confirm the starting value and progression in the active game rather than inferring them from one image.

Risk Level Selector
The captured interface shows a horizontal bar with Low, Medium, High and Extreme labels. Confirm each current ceiling and whether switching is allowed during or only between rounds in the active help panel.

Gameplay Flow Diagram
This visual turns the captured controls into a pre-play checklist. It shows where to look for the risk, stake, start, multiplier and Withdraw controls without asserting an undocumented outcome sequence.
Step-by-Step: Your First Round
This walkthrough follows the visible controls from opening the game to a cashout decision. Use demo mode first, select a risk level deliberately, and confirm all limits in the current help panel.
Select Your Risk Level
Tap a choice in the risk level bar at the top. Note the displayed maximum multiplier, then confirm in the current rules how the selection affects the round before pressing Play.
Set Your Bet Amount
Tap the bet field and enter an amount within a budget set before play. Use the /2 or x2 controls only after checking the operator's current minimum, maximum, currency and bonus restrictions.
Press Play
The captures identify a green Play control and the chicken-and-train play area. Use the current start control, then observe its live label and state; do not assume that "Go" has the same meaning in every operator build.

Watch the Multiplier Grow
The nearby 1.10x screenshot identifies the golden egg as the multiplier display. Confirm progression and timing in the active game rather than treating one capture as a paytable.
Cash Out or Keep Going
This is the core decision. The Withdraw panel shows the potential payout. Check the operator's settlement rules, choose any cashout limit before the round, and do not treat a target multiplier as a promise of consistent returns.
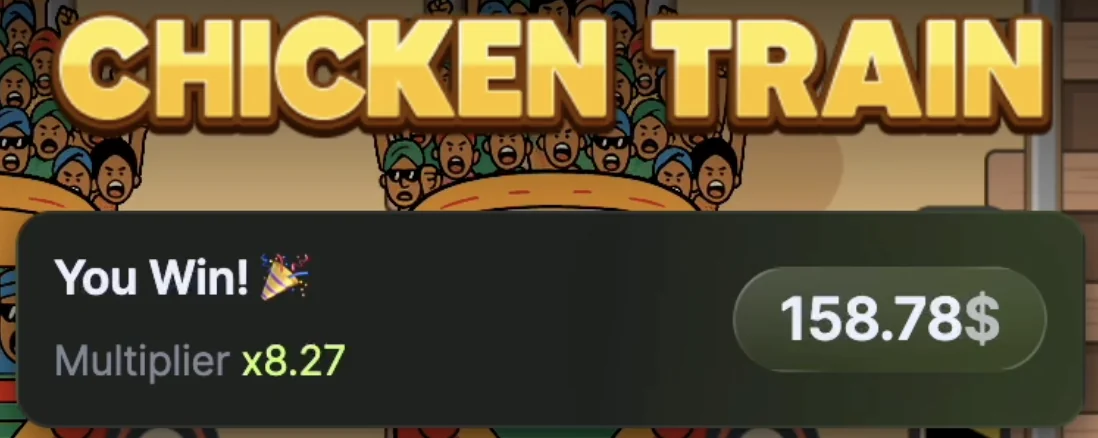
Win Confirmation
The named result capture shows a "You Win!" banner, an 8.27x display, payout text and a dollar-eyes pose. Treat it as an interface example, then verify settlement and balance-update timing with the operator.
Round pace and the transition to the next available action depend on the current build, connection and operator. Use demo mode to learn where the controls appear without treating one run as a timing benchmark.
If your operator offers it, use the free demo mode to inspect controls with a virtual balance. Compare its rules and features with the paid build instead of assuming they are identical.
Paytable & Multipliers
The displayed payout changes with the multiplier at cashout. Because the repository does not contain a versioned provider paytable, use this table as a checklist for the active game panel rather than as a claim about exact progression.
| Risk level | Displayed ceiling | Step values | Bonus Run | Operator limits |
|---|---|---|---|---|
| Low | Check panel | Check panel | Check help | Check terms |
| Medium | Check panel | Check panel | Check help | Check terms |
| High | Check panel | Check panel | Check help | Check terms |
| Extreme | Check panel | Check panel | Check help | Check terms |
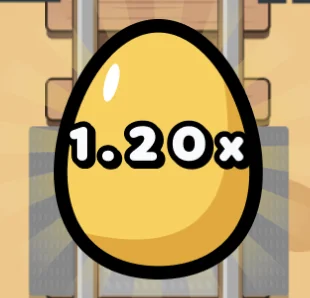
Important note: the repository screenshots show examples including 1.10x, 1.20x, 1.78x and 8.27x. They document visible interface states, not their frequency, expected return or availability in every operator build.
The practical takeaway is to compare the current ceiling, step values and payout cap for every risk option inside the active game before committing a stake.

For a framework for evaluating expected value and cashout points, see the Chicken Train strategies guide and verify its inputs against the active rules.
Understanding Risk Levels in Detail
The risk selector presents four labels. Treat them as interface categories, then verify the current multiplier ceiling, train behavior and payout cap shown for each option.
Low Risk
Use demo mode to observe how this option behaves without assuming a win frequency from its label. Check the live ceiling and rules, and keep any paid stake within a fixed loss limit.
Medium Risk
Compare this option with Low in demo mode, focusing on the displayed ceiling and step progression. A short demo illustrates controls but does not establish outcome frequency or expected return.
High Risk

The High label signals a more volatile choice, but it does not establish a particular losing streak or bankroll requirement. Confirm the live rules and use a pre-set loss cap rather than increasing stakes after losses.
Extreme Risk
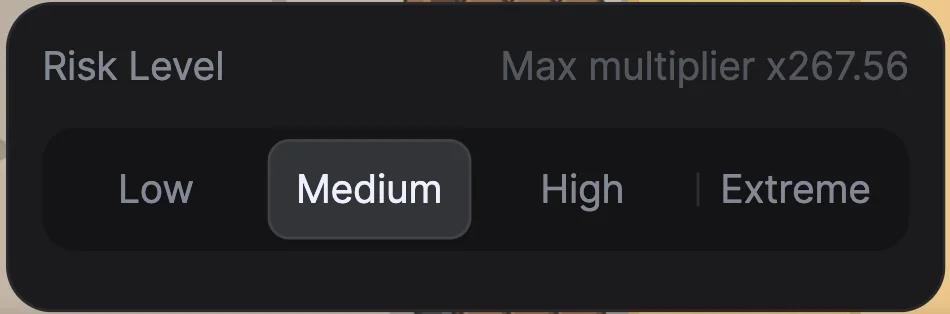
Extreme is the strongest risk label in the captured selector. Verify its current loss conditions, ceiling and payout cap, and use any available demo until those rules fit a pre-set entertainment budget.
Bonus Run Feature
Bonus Run rules can vary with the current game build. Before paid play, open the in-game help panel and verify each condition below.
- Trigger timing — check the earliest eligible step in the current help panel
- Activation condition — confirm whether an approaching train is required
- Step handling — confirm whether intermediate positions or only the final multiplier count
- Risk relationship — check whether the selected risk level changes run length; do not infer skipped steps from the label alone
- Loss condition — read how a train contact during the dash is settled
- No-train condition — verify whether Bonus Run can activate without a train on the current step

When Bonus Run appears in demo mode, record the starting step, ending step and final multiplier. A single run illustrates the interface; it does not establish trigger frequency or expected return.
The repository captures document the Bonus Run theme and a dollar-eyes character pose. Confirm any sprint sequence, labels and animation timing in the current build.
Auto-Cashout & Auto-Bet
Auto-cashout availability and behavior are operator-specific. If the control appears, verify it in the current rules before relying on it.
Auto-Cashout
If the current operator provides auto-cashout, its rules should explain when a target is set and executed. Potential uses include:
- Applying a target selected before the round
- Following the operator's documented disconnect settlement, where supported
- Removing emotional decision-making from gameplay
A pre-set target can enforce a decision made before the round, but no target guarantees profit or a more stable balance.
Auto-Bet
Auto-bet availability, repeat behavior and interaction with auto-cashout are operator-specific. If the control appears, read its stop conditions and test it with virtual funds before enabling any repeated action.
Before enabling auto-bet, set the round count, stake and loss limit, and verify whether auto-cashout remains active. Stop the feature immediately if the controls or settlement rules are unclear.
Common Mistakes to Avoid
These checks address common risks visible in the controls and operator rules; they are not presented as findings from an undocumented session log.
1. Starting on High or Extreme Risk
A large displayed maximum does not show how often it is reached. Learn the controls in demo mode and confirm the payout cap before considering paid play.
2. Chasing Losses by Increasing Bets
Increasing a bet after losses does not guarantee recovery. Keep the stake and loss limit set in advance, and confirm the operator's fairness explanation rather than assuming how its random process works.
3. Ignoring the Withdraw Button on Mobile
Use demo mode on the intended device to check the Withdraw control's size and responsiveness. If auto-cashout is available, verify its operator-specific behavior before relying on it.
4. Not Using Auto-Cashout for Consistent Play
A predetermined cashout setting can reduce in-round changes of plan, but it does not produce consistent returns or remove the risk of loss.
5. Playing Without a Session Budget
Set a fixed entertainment budget and stop point before play. Read RTP and house-edge information from the active rules instead of relying on an unversioned percentage.
Ready to put these tips into practice? Start with the free demo, then read the strategy guide for bankroll management math.
Content Update History
- — Added Bonus Run details, updated risk level screenshots, added gameplay flowchart
- — Added a risk-level and active-paytable verification checklist
- — Initial publication with interface breakdown and step-by-step guide
Frequently Asked Questions
The repository does not contain a versioned rule for a fixed step count. Check the current help panel for the selected risk level and treat each round outcome as variable.
The captured interface shows a risk selector, but switching rules can depend on the current build. Confirm in the active help panel whether changes are allowed during or only between rounds.
Disconnect settlement and auto-cashout behavior depend on the operator. Read the current disconnect policy and test available controls in demo mode, especially on mobile.
Availability depends on the operator. If auto-cashout appears, check the current rules for when it executes and remember that a target does not guarantee consistent results.
Repository captures show the golden egg as a multiplier display, including a named 1.78x example. Confirm how that display maps to the potential cashout and settlement in the active operator rules.
The interface presents Bonus Run as a multi-step dash. Check the current help panel to confirm its trigger conditions and whether the selected risk level changes its length; do not infer skipped steps from the risk label alone.
Browser and app availability depend on the operator and region. Test the current game in a supported mobile browser and use only an official operator installation option. See the mobile installation guide for verification steps.
Sources
- Repository interface capture:
images/interface/chicken-train-gameplay-chicken-dodging-trains.webp - Repository multiplier captures:
images/interface/chicken-train-golden-egg-multiplier-1x.webp,chicken-train-golden-egg-multiplier-1-10x.webp,chicken-train-golden-egg-multiplier-1-20x.webp,chicken-train-golden-egg-multiplier-1-78x.webp, andchicken-train-golden-egg-multiplier-8-27x.webp - Rules note, checked 2026-08-26: verify detailed Bonus Run, payout and risk-level conditions in the active operator help panel before paid play
June 23, 2026 play guide update
Chicken Train Casino play guide update for June 23 focuses on the step between reading the rules and opening a live round. The how-to page should make rail timing, step risk, cash-out choices, demo access, and mobile route clarity understandable before the player sees a deposit button. A good guide does not only say when to tap, cross, climb, or cash out; it also explains what can be checked in demo mode and what belongs to the casino account screen.
Before playing for money, use free rounds to confirm train movement, target step, stake range, loss cap, and country-specific casino rules. Then set a small session limit and keep the stake flat even after a failed attempt. Bonus offers should be read outside the game flow for wagering, max bet, eligible games, expiry, KYC, withdrawal review, currency support, and country access. Mobile players should use verified browser play or an official operator app, not copied APK files. Chicken Train Casino is easier to treat as entertainment when the guide keeps controls, risk, and stopping rules together.